This article provides an overview of how to create an automation in the Boldem app and how to work with individual control elements.
Before you begin
Before creating an automation, make sure your account meets the following minimum requirements:
- You are using the E-mailing plan, or a higher plan, which allows creating unlimited automations. Plan information can be found in the Billing menu after login to your account.
- You have a verified sending domain in your account. Details about the domain can be found in Settings/Domains.
You will also need:
- Set the goal you want to achieve with the automation and create the scenario that will govern how it behaves.
- Create a template or templates. All templates you use in an automation must be created as transactional.
- Mailing list – depending on whether you’re collecting recipients or sending messages to existing recipients, you’ll need a mailing list in either case. It’s a good idea to create and name a mailing list to suit your scenario. In Boldem you can split, merge, sort, or segment your mailing lists as needed.
- If you want to use automation to analyze user behavior on your website, e.g., in an online store, you must first integrate it with Boldem. Click here to view options for integrating Boldem with other platforms.
Creating an automation in Boldem
- Log in to your Boldem account and go to the Automation section.
- Click Create new automation.
- Enter an automation name and a description. Both are for your reference and can be changed later on the Settings tab in the automation details.
- Confirm your submission by clicking Create automation.
The automation diagram opens, with an overview of blocks you can use in an automation on the left and a canvas on the right where you’ll place them. Adding is done by dragging and dropping individual blocks (drag and drop).
Remember that the automation isn’t saved automatically, so we strongly recommend saving it regularly by clicking the Done/Save button. You can edit the automation for as long as you like — it won’t activate until you click the Start button.
Automation blocks
Blocks have different functions and are divided into 4 categories:
Triggers
Triggers determine when or under what circumstances an automation runs, and most triggers allow more detailed configuration, such as the mailing list the automation targets, segmentation, or other conditions.
- Now – the automation will start immediately after you save and start it.
- Repeat – the automation will be triggered repeatedly according to the specified parameters – every X days, weeks, or months at the selected time.
- Anniversary event – the automation triggers when a specific date occurs – either based on data entered for the recipient, or according to the internal calendar (holidays and anniversaries for the Czech Republic and Slovakia).
- Website event – if your website or online store is integrated with Boldem, an automation will be triggered, for example based on the order status or another event you program on your website.
- Email actions – automation is triggered by an action the recipient took in a bulk or transactional email within a specific campaign. This can be an email open, a link click, or the dispatch of the email itself.
- SMS actions – automation is triggered based on the dispatch of bulk or transactional SMS messages within a specific campaign.
- Subscribes to a list – the automation starts after a recipient subscribes to the selected mailing list. The subscription can occur via a subscription form, the API, or through an integration — an app connected to Boldem.
- From an integration – an advanced way to start an automation that runs in response to an integration, i.e., an app integrated with Boldem. For example, it can be an integration via Make (formerly Integromat).
Operators
Logical operators that let you branch or route automation in various ways.
- Condition – allows automation to branch based on a positive or negative evaluation of a condition. The condition can be set using recipient data, or by the recipient’s activity in campaigns, transactional emails, or on the website.
- Wait – pauses the automation until a specific date is reached or a specific amount of time has elapsed.
- Start another automation – use this block to start a different automation.
- Custom – an advanced block that lets you insert your own code in the Scriban scripting language, which the block then runs.
- Branching – the block lets you branch the automation flow without any additional conditions.
Actions
Use actions to specify what activity you want to perform during a given automation run.
- Send email – as part of the automation, an email is sent, i.e., a specifically chosen template.
- Send SMS – an SMS message will be sent as part of an automation.
- Edit mailing list – during automation, the recipient will be added to the mailing list based on the specified rule.
- Edit recipient – allows you to edit recipient details you have set for individual recipients. This can include a birthdate, a note about whether the recipient used a promo code, and similar.
- Unsubscription – during automation you can unsubscribe a recipient, i.e., remove them from a specific mailing list or globally from all lists. Unsubscription can optionally be set for a specific period.
- Subscription – during automation you can add a recipient to a specific mailing list.
- Webhook – an advanced action that lets you send selected recipient data (email address, name, phone, etc.) from an automation to a URL in your system using the GET or POST method.
Working with automation blocks
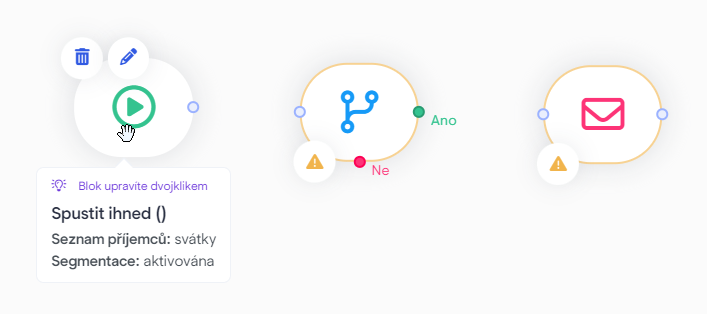
When creating an automation, drag the blocks you want to use onto the canvas. After placing each block, configure it. Until a block is configured correctly, it will show an exclamation icon and you won’t be able to start the automation.

Configure a block by double-clicking it or by clicking its pencil icon.
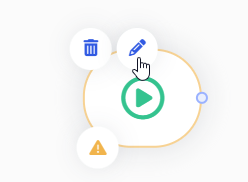
Clicking it opens a menu on the left side of the editor where you can make the desired settings and save them by clicking Save. A properly saved block won’t have an exclamation mark icon:

You can place blocks on the canvas any way you like (left to right, top to bottom, etc.), but after finishing the setup it’s important to integrate the blocks so they follow the intended sequence.
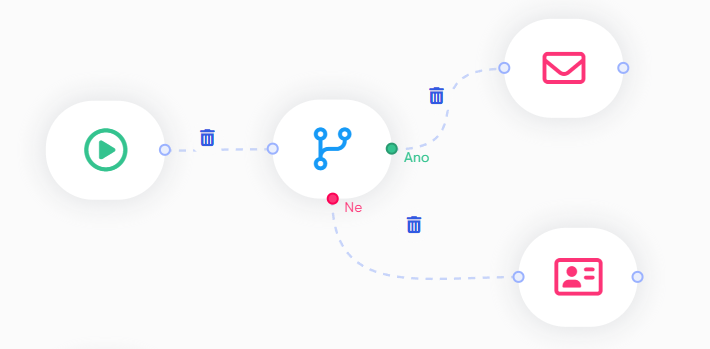
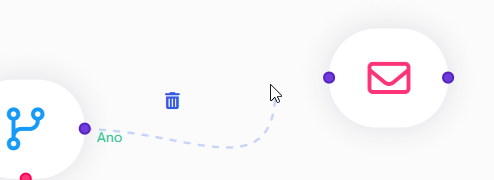
Create the integration by clicking the dot on a block’s margin and dragging it to one of the highlighted dots on another block’s margin. You can delete the integration at any time by clicking the trash icon.
For some blocks, you can view a brief preview of their properties by clicking the block:
Automation testing
Before starting any automation, it’s important to test it thoroughly. We strongly recommend this even for simpler automations, because mistakes are easy to make and nothing is worse than performing an irreversible action on a large number of recipients.
View details on testing automations.
View recipients affected by the automation
During testing, you can also verify which recipients the automation will apply to. This option is available only for certain blocks. To view the list of recipients the automation will run for, click Options in the automation editor and select Recipients overview.
Start automation
Once you’ve tested the automation and are satisfied with how it works, you can start it at any time by clicking the Start button. The automation overview will appear.
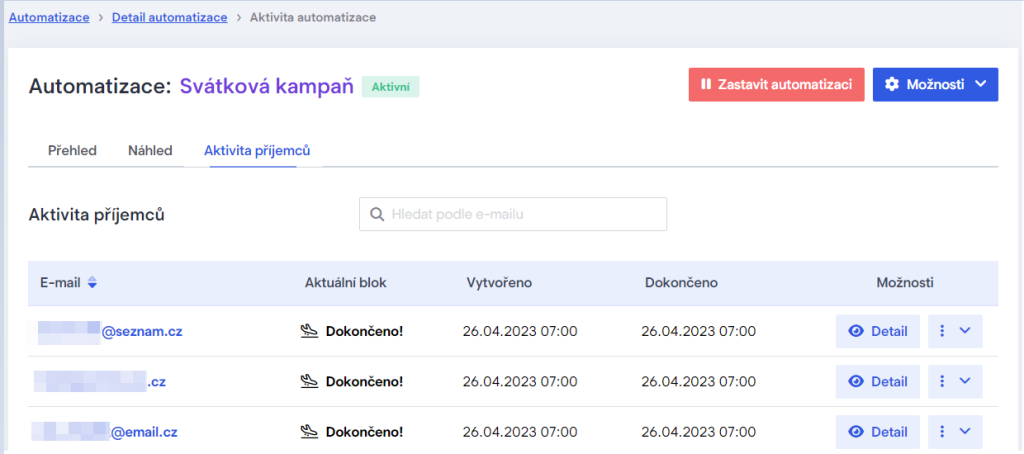
In the overview, in addition to statistics, you can also track the automation’s progress on the Recipients’ activity tab, where you’ll find individual recipients and see which step or status they’re currently in within the automation.
Edit started automation
Parameters of a started automation cannot be edited. You can only monitor its execution by clicking through the individual tabs in the automation details:
- Overview – contains recipient statistics
- Preview – overview of individual blocks.
- Recipients’ activity – a list of individual recipients who entered the automation. Click Details for a recipient to view the complete path they took through the blocks and their current status. You can also remove a recipient from the automation by clicking Delete recipient in the three-dot menu.
To change an automation’s settings, click the Stop Automation button in the automation overview and select Options/Edit Automation. After finishing your changes, be sure to thoroughly test the automation and start it again.
Automation examples
Get inspiration from the automation scenarios below: