Subscription forms in Boldem can be displayed on a website integrated with Boldem and used to collect data, most often recipients’ email addresses. You can also automate data collection.
There are two types of subscription forms:
- Pop-up – a pop-up form that appears to a website visitor as a page overlay based on rules you define.
- Embedded – a form that appears as part of the web page.
Find the steps to create each form below.
Prerequisites
To create a subscription form, you’ll need:
- The mailing list where form recipients will be saved
- Connected website, where you want to display the form.
- In the case of an embedded form, there’s also the option to edit the specific web page where you want the form to appear. To display an embedded form, it’s not enough to insert only the integration code on the website; you also need a unique class or ID. See the steps below for details.
Pop-up form
Below you’ll find instructions for creating a popup form that appears to website visitors as a page overlay based on rules you define.
- Click on Subscription forms and select Create new form.
- Select Pop-up.
- Enter the form name. This is for your reference.
- From the Main mailing list drop-down menu, select the list where you want to save the form’s recipients.
- From the Website drop-down menu, select the website you integrated with Boldem and on which you want to display forms.
- Optionally enter a description of the form for your reference and click Create form.
- The form editor opens with the following menu:
- Use sample form – select this to edit the sample two-step form.
- Use a blank form – select if you want to start creating the form from scratch.
The process of creating a form is similar in both cases; with the sample form, the individual elements are already prepared for you and only need to be configured. The sample form also contains two steps. The second step appears after the user submits the form. If you don’t want to display this step, just remove it; in that case the form will simply close after dispatching the data.
- If the form is empty, click Insert content.
- The left menu opens with elements you can insert into the form. As a minimum, the form will need a text field for entering data and a button to dispatch the form.
- Drag the Text Field block onto the editor canvas on the right.
- Click inside the text field. The Edit block menu appears on the left.
- To collect email addresses with a form, choose the custom field to store the data in — Email — from the drop-down menu.
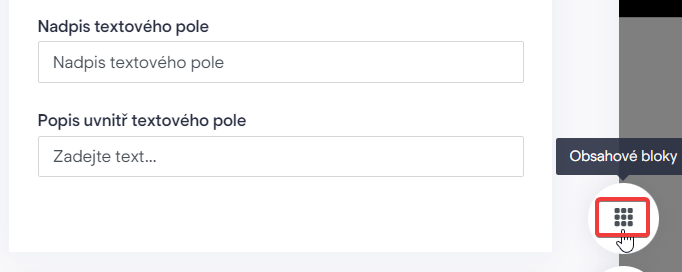
- Customize the title and description of the text field to suit your needs.
- Click the grid icon to view the list of content blocks.

- Drag the Button block onto the canvas to the right. Typically, the button is placed below the text field.
- To edit the button style, click it and choose the properties you want. You can also add any other content, such as images or extra text, adjust colors, change the background, show a close button for the form, and so on.
- Once you’re satisfied with the changes, click the Enable button at the top of the page.
- Save the form by clicking Done and select Save & Exit.
Note: Don’t be confused if the form’s background shows a page from the sending domain instead of the website where you plan to display the form. This is for illustrative purposes only. You can find your website’s address in Settings/Websites.
By default, the form is shown to each visitor only once and immediately after all pages on the integrated website have loaded. On the Settings tab, under Window configuration, you can customize the form’s behavior and how it is displayed:
- For testing purposes, it can be useful to temporarily show the form repeatedly. In that case, turn off the toggle switch for Show only once. When you’re finished testing, remember to switch it back.
- By default, the form displays immediately when the page loads. In the drop-down menu Trigger type, you can choose when to display the form.
- To show the form only on specific pages of your website, select the appropriate option in the drop-down menu Condition for displaying the form.
- If necessary, you can also restrict the form’s visibility to specific IP addresses.
Embedded form
Below you’ll find the steps to create a form that will be permanently displayed on a web page.
- Click on Subscription forms and select Create new form.
- Select Integrated.
- Enter a form name. This field is for your reference.
- From the Main mailing list drop-down menu, select the mailing list where you want to save recipients from the form.
- From the Website drop-down menu, select the website that you integrated with Boldem and on which you want to display forms.
- Optionally enter a form description for your reference and click Create form.
- The form editor opens with the following menu:
- Use sample form – select if you want to edit the sample two-step form.
- Use a blank form – select to start creating the form completely from scratch.
The integrated form always displays at least two steps. If you create only the first step, after the form is dispatched a generic dispatch message will be displayed in the browser’s language. Therefore, we strongly recommend always creating the second step as well, where you place the content you want the user to see after the form is dispatched.
The process of creating a form is similar in both cases; with the sample form, the individual elements are already prepared for you and only need to be configured.
- If the form is empty, click Insert content.
- The left menu opens with elements you can insert into the form. At a minimum, you’ll need a text field for entering data and a button to dispatch the form.
- Drag the Text field block onto the editor canvas on the right.
- Click inside the text field. The Edit block menu will appear on the left.
- To collect email addresses using the form, select the custom field where you want to store the data from the drop-down menu: Email.
- Edit the title and description of the text field to suit your preferences.
- Click the grid icon to view the list of content blocks.
- Drag the Button block onto the canvas on the right. The button is typically placed below the text field.
- To edit the button style, click it and choose the properties you prefer. You can also add other content like images or extra text, adjust colors, change the background, display a close button for the form, and more.
Similarly, we recommend adjusting the form’s second step, which is necessary if you don’t want the user to see only an impersonal, generic message after the dispatch of the form:
- Next to the settings and info panel, click the ⊕ icon.

- An empty canvas will appear; drag the desired blocks into it as before. If you don’t want to collect data in the new step, you can just add a text or image block, but feel free to get creative.
- You can easily switch between steps by clicking ①, ②, and so on.
Now edit the page on your website and add a unique class or ID where you want the form to appear. Follow these steps:
Add HTML code with a unique identifier (ID or class) to the selected page. This identifier is typically part of a tag, such as a .
Identifier must be unique and contain only letters and hyphens, no spaces, no special characters. For example: .my-newsletter or #first-form-id.
Example of such a tag with a unique class identifier:
<span class="muj-formular">Similar example with ID:
<span id="my-form">After entering the corresponding identifier, return to the form settings:
- On the Settings tab, click Form View Configuration.
- Enter a unique identifier with the corresponding symbol in the first field. For a class, use a dot:

- For ID, use the X icon:

In the additional settings, choose how, when, and to whom you want the form to be displayed. By default, the form will be shown to every visitor on all responsive screen sizes.
Once you’re satisfied with the changes, click the Enable button at the top of the page. Save the form by clicking Done and selecting Save and exit.
Finally, make sure the form displays on your website as you intended.
Using this method, you can display any number of different forms on the website. Each must have a unique ID or class.