In this tutorial, we will guide you through the process of setting up the DKIM, SPF, and CNAME (domain router) records with GoDaddy domain provider. Setting up these records is essential to securely send bulk emails from the Boldem app and to prevent emails from being marked as spam.
- Log into your account in the Boldem app.
- Select Settings from the left menu and click Domains.
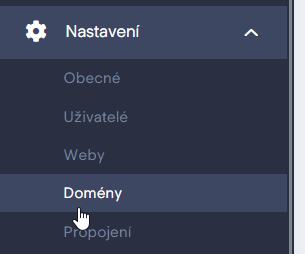
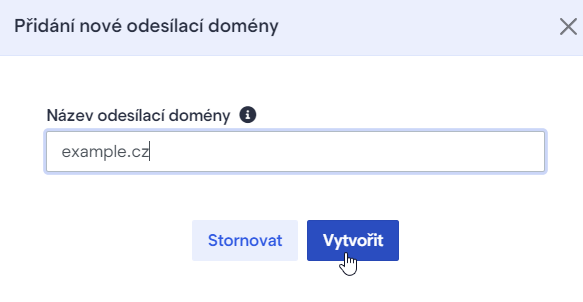
- If you did not enter a sending domain name when you created your account, click + Add a sending domain. However, if you already entered a domain and see it listed, skip to step 4 below.

- Enter the name of the sending domain and confirm with Create. Make sure to enter the domain without www, e.g., example.com.
- Click the Detail button next to the domain in the list.

- Click the Domain settings tab.

- The page will display the data for the DKIM signature, the SPF record, and the CNAME record. Leave the window with these details open as you will require them shortly.
- In a new window, log into your domain management account with Godaddy at https://account.godaddy.com/.
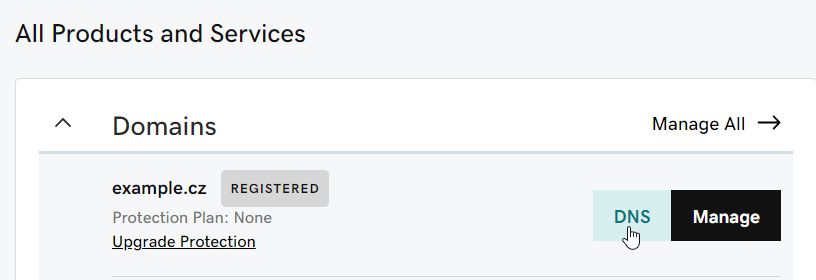
- In the All Products and Services section, click the DNSThe Domain Name System (DNS) is a hierarchical and distributed naming system for computers, services, and other resource... button by the domain you wish to modify.
- The following DNS Management menu will appear, displaying the DNS Records tab:
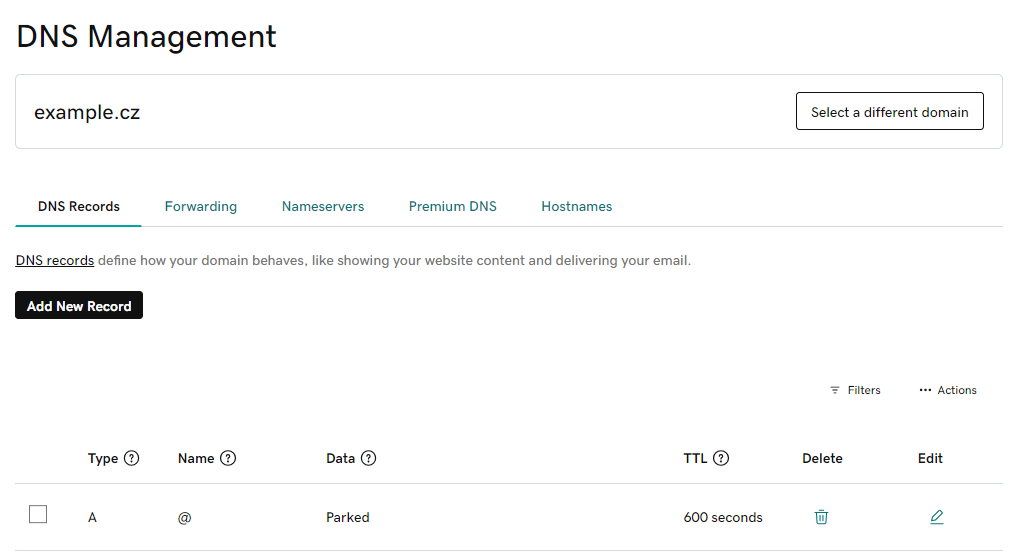
- Click Add New Record to add a new record and follow the steps below.
Setting up DKIM record
- In the Godaddy interface, select TXT from the Type drop-down menu.
- In your Boldem account, go to the DKIM signature section and copy the required record from the Name field by clicking the copy icon.

- In the Godaddy interface, paste the copied information into the Name field.
- In your Boldem account, go to the DKIM signature section and copy the required record from the Value field by clicking the copy icon.

- In the Godaddy interface, paste the copied data into the Value field.

- Do not change the value in the TTL menu.
- Save the record by clicking Save. The resulting record should appear similar to this:

Setting up SPF record
Important notes:
- Each domain or subdomain can only have one SPF record.
- If your domain already has an SPF record, insert the data from Boldem into the existing SPF record instead of creating a new one.
- When checking TXT records with SPF data, make sure you edit the data for the correct domain! The SPF data may differ for the base domain form (e.g. example.com) and for the subdomain (e.g. subdomain.example.com). In Boldem, the base domain form (example.com) is the one you are likely to use the most.
- An SPF record can contain data for a maximum of 10 domains.
Editing existing SPF record
In case you find a TXT record in the list of domain records containing SPF information for your domain (e.g., example.com), make sure you edit the existing record instead of creating a new one. Below is an example of an existing record:
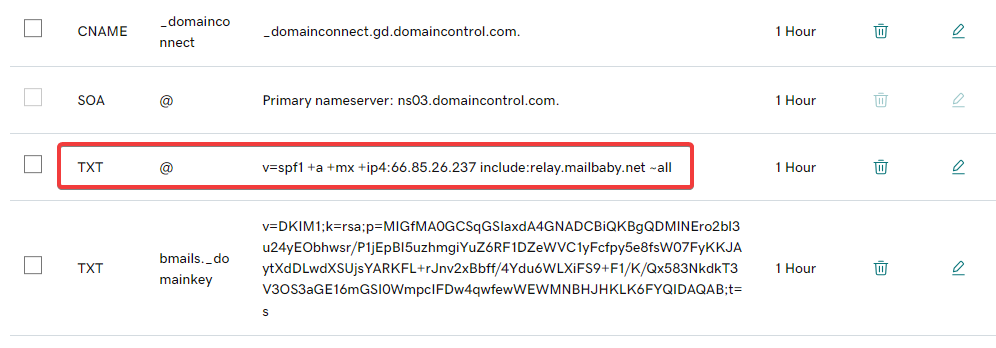
Pokud na konci existujícího záznamu SPF najdete symbol otazníku (?all), znamená to, že záznam SPF je neaktivní! V takovém případě je zapotřebí při úpravě (viz následující postup) otazník nahradit značkou spojovníku, tedy -all. Před aktualizací záznamu je vhodné kontaktovat správce (registrátora) vaší domény a konzultovat důvody k použití otazníku v nastavení.
- Click the edit icon to the right of this record.

- A new dialog will appear to change the data. In the Value field, insert the include:spf.boldem.cz string before the ~all tag.

- Save the record by clicking Save.
Adding new SPF record
If you do not find a TXT type record in the list of domain records that contains SPF information for your domain, proceed with these steps:
- In the Godaddy interface, select TXT from the Type drop-down menu.
- Insert the @ sign in the Name field.
- In your Boldem account, copy the necessary record by clicking the copy icon in the Value column under SPF record.

- In the Godaddy interface, paste the copied data into the Value field.

- Do not change the value in the TTL menu.
- Save the record by clicking Save. The resulting record should appear similar to this:

Setting up CNAME (domain router) record
- In the Godaddy interface, once again click Add New Record by the selected domain.
- From the Type drop-down menu, select CNAME.
- In your Boldem account, copy the necessary record by clicking the copy icon in the Name column under CNAME (domain router).

- In the Godaddy interface, paste the copied information into the Name field.
- In your Boldem account, copy the necessary record by clicking the copy icon in the Value column under CNAME (domain router) .

- In the Godaddy interface, paste the copied data into the Value field.

- Do not change the value in the TTL menu.
- Save the record by clicking Save. The resulting record should appear similar to this:

Validating domain records
Once the records are set up, there is a delay before the information is acknowledged by the domain servers. With most providers, this process completes within an hour or within 24 hours at the latest.
After setting up each record, navigate to Settings/Domains in the Boldem application, select your domain, and on the Domain Settings tab, click Check settings.

Ideally, the check should result in green-highlighted information for each record:
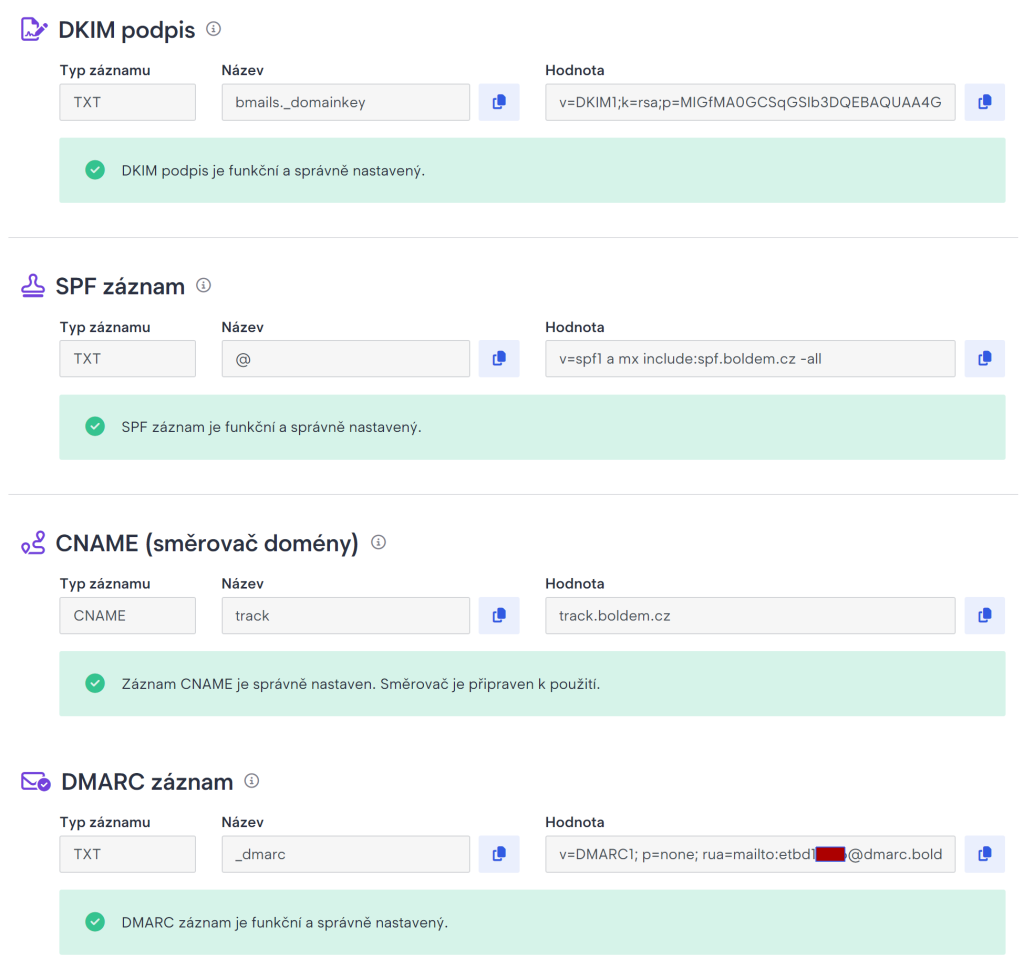
If the changes to the domain do not take effect even after 24 hours, contact the customer support of your domain provider to verify that the records are entered correctly and then repeat the verification of domain settings in the Boldem application.