You can view the subscription forms in Boldem on the website integrated with Boldem and use them to collect data, most commonly the recipients’ email addresses. You can also choose to automate data collection.
To create a subscription form, you will need to choose a mailing list where you want to store the recipients from the form, and have a website integrated with Boldem. Once you have completed these two steps, you can proceed to create a subscription form by following the procedure below:
- Click Forms and select Create a new form.
- Fill in the name of the form. This information is for your reference.
- Select the list to which you want to save the recipients from the Primary mailing list drop-down menu.
- From the Website drop-down menu, select the website that you have integrated with Boldem and on which you want to display forms.
- Optionally, enter a description of the form for your reference and click Create a form.
- The form editor is displayed. Click Insert content.
- The left-hand menu will open, offering various elements that you can incorporate into your form. At the very least, you should include a text field for data entry and a button for form submission.
- Drag the Text field block onto the editor canvas on the right.
- Click inside the text box. Modification of the block appears on the left.
- If you wish to use the form to collect email addresses, select Email from the Custom field where the data will be stored drop-down menu.
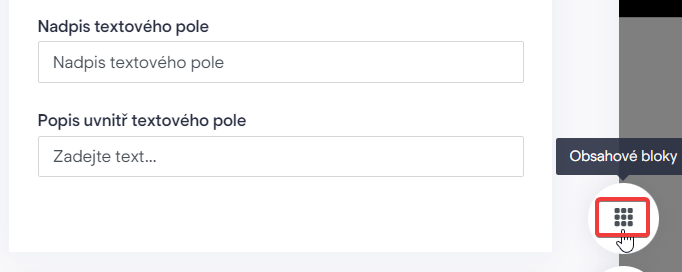
- Edit the title and description of the text field to your suit your preferences.
- Click the grid icon to view a list of content blocks.

- Drag the Button block onto the canvas on the right. Typically, the button is placed below the text field.
- To modify the button style, click on it and choose your preferred properties. You can also include extra content like images or additional text and make adjustments to colors, background, or add a close button to the form, etc.
- Once you are happy with the changes, click the Enable button at the top of the page.
- Save the form by clicking Done and selecting Save and leave.
Note: The form background shows the page of the sending domain rather than the website where you plan to display the form. Your website address can be found in Settings/Websites.
By default, the subscription form is displayed to each visitor only once and immediately after all pages on the integrated website are loaded. Select Window configuration from the Settings tab to customize the behavior and display of the form:
- For testing purposes, it may be practical to temporarily display the form repeatedly. To do this, switch off the Show only once toggle. When testing is complete, make sure to revert the settings.
- By default, the form is displayed immediately after the page loads. In the Trigger type drop-down menu, you can choose when you want to display the form.
- If you want to display the form only on specific pages of your website, select the appropriate option in the Condition to show the form drop-down menu.
- If necessary, you can also restrict the form to certain IP addresses only.