To make your email or SMS messages as personal as possible, it is advisable not only to send content that is targeted at your recipients, but also to address them by their first or last name. Furthermore, it is ideal to add a gender distinction. This makes your messages feel more personal and increases the chances that recipients will open and read yours in a flood of other messages. They can even have some of them stick in their minds. Boldem performs these functions automatically, but you need to set everything up correctly first.
Setting the gender of the recipient
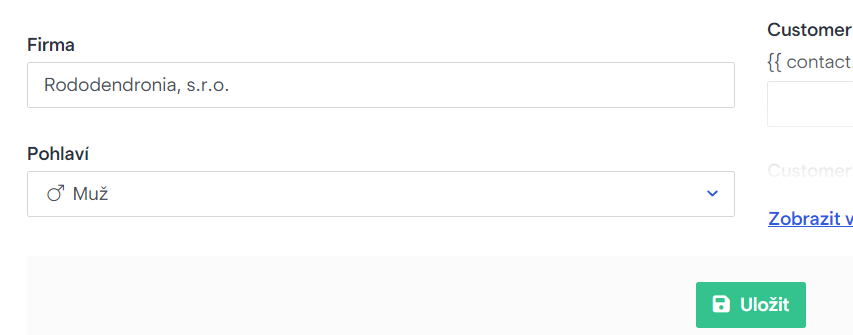
To achieve the best result with personalized salutations, it is advisable to add the gender for each recipient. You can manually set this value on the Edit recipient tab in the mailing list.

Obviously, manual update of these data is very impractical. Therefore, you can check the option Add gender of the recipient according to the calendar names of the country when importing files. For Czech and Slovak first names, the gender is assigned automatically. However, in the case of a non-standard name, the gender will most likely have to be manually updated.

Naturally, you can import a mailing list with the recipients gender already specified. In this case, naming the column Gender would be the most practical. While specifying the values, add either Male or Female by each recipient.
Automatic declension of first names
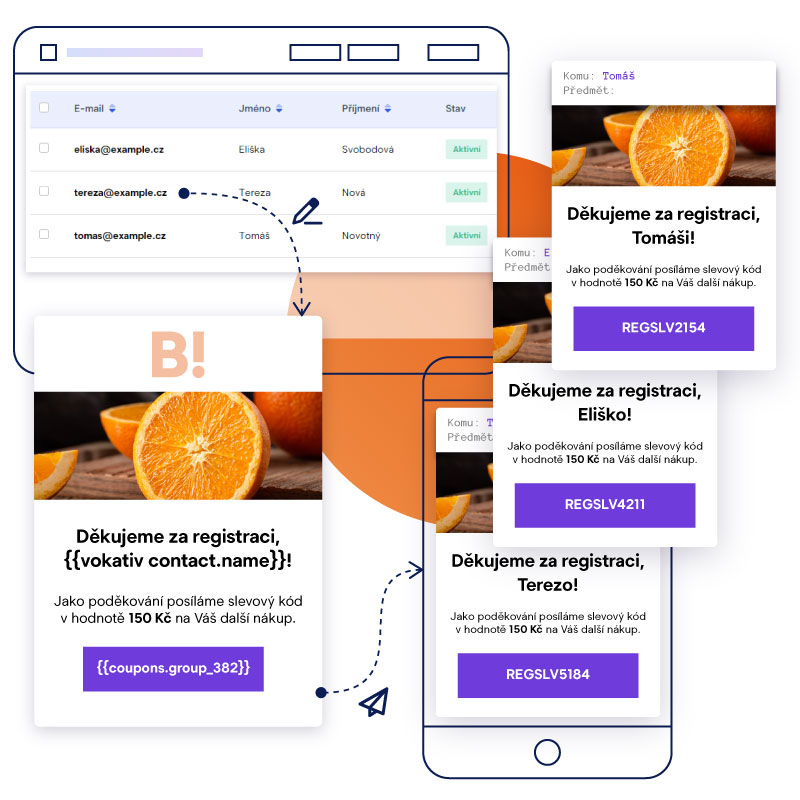
Boldem offers automatic declension of first names into the 5th case – vocative. The variable Vocative is used to generate salutations. Use this variable by inserting the following string into the template:
{{ vokativ contact.name }}
After dispatching the message, this string will be replaced with the recipient’s first name in the correct vocative form. For example, if the recipient’s first name is Jana, the template will display Jano. Alternatively, if you want to choose a more familiar approach with Ahoj Jano (Hi Jana), use the following string:
Ahoj {{ vokativ contact.name }},
For example, if your goal is to express gratitude for registering, use the following string:
Thank you for your registration, {{ vokativ contact.name }}!

Automatic declension of surnames with gender distinction
In a vast number of personalized salutations, not only do you need to correctly spell both the first and last names, but also to change the salutation to match the person’s gender. Since Boldem allows you to enter the gender of recipients, using the designated variable should make this process a walk in the park.
In certain cases, the gender of the recipients is automatically stored according to the first or last name entered (e.g., when manually inserting recipients or optionally during bulk import). In the case of non-standard names, the gender is not automatically set. Therefore, it is advisable to verify those names first and add the names manually if needed.
If you have set the gender of your recipients, you can use the string below in the template instead of manually addressing recipients:
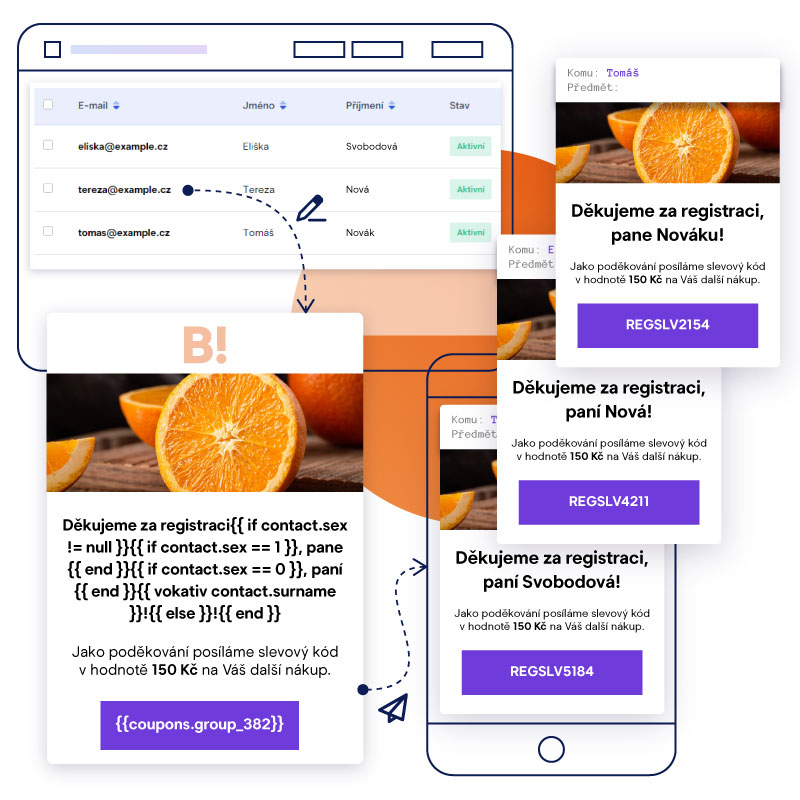
Thank you for your registration {{ if contact.sex != null }}{{ if contact.sex == 1 }}, Mr. {{ end }}{{ if contact.sex == 0 }}, Mrs. {{ end }}{{ vokativ contact.surname }}!{{ else }}!{{ end }}This string is actually a script code that evaluates whether the recipient has the correct gender setting, thus applying the salutation accordingly:
- If the gender is set to Male and the recipient’s last name is Novák, the following salutation will be used: Thank you for your registration, Mr. Novák!
- If the gender is set to Female and the recipient’s last name is Svobodová, the following salutation will be used: Thank you for your registration, Mrs. Svobodová!
- If gender is not set, the following universal salutation will be used: Thank you for your registration!
Naturally, you can modify the text of the salutation (bold text in the example) to your liking. We recommend that you always test the salutation thoroughly on a small sample of test recipients using every possible variation (i.e. with both genders and a recipient without gender).

Using variables for further personalisation
Across the Boldem app, you can work with so-called variables in the editor. There are several types of variables, however, the principle always stays the same. Every variable is a kind of string surrounded by two compound brackets that replaces specific data. For example:
{{ contact.name }} {{ contact.surname }} ({{ contact.email }})
{{ contact.company }}
Variables are quite easy to use. First, you copy and paste the string into the desired template. Once dispatched to the intended recipient, the message will display the specific text instead of the bracketed string.
In the following example, the recipient’s first and last name will be listed with the email address in brackets and the company name:
Alena Boldemová (Alena.Boldemova@example.cz)
První Boldemová, s.r.o.
You can also create variables yourself and assign any data to them. There are several types of variables. Details on these can be found below and in the referenced chapters:
- Global variables are variables that you create in Settings/Variables, and then use in any campaign or template. Examples of global variables are the repeating parts of templates, such as contact information, headers, footers, and so on.
- Ready-made variables are basic variables such as the above mentioned first names, last names, company name, etc. Variables can be manipulated using scripting code, using conditions, formatting output, and so on.
- Custom fields are fields where you can enter the properties of your recipients.